about about shops fave blogs features tutorials
Showing posts with label tutorials. Show all posts

Wednesday, May 15, 2013

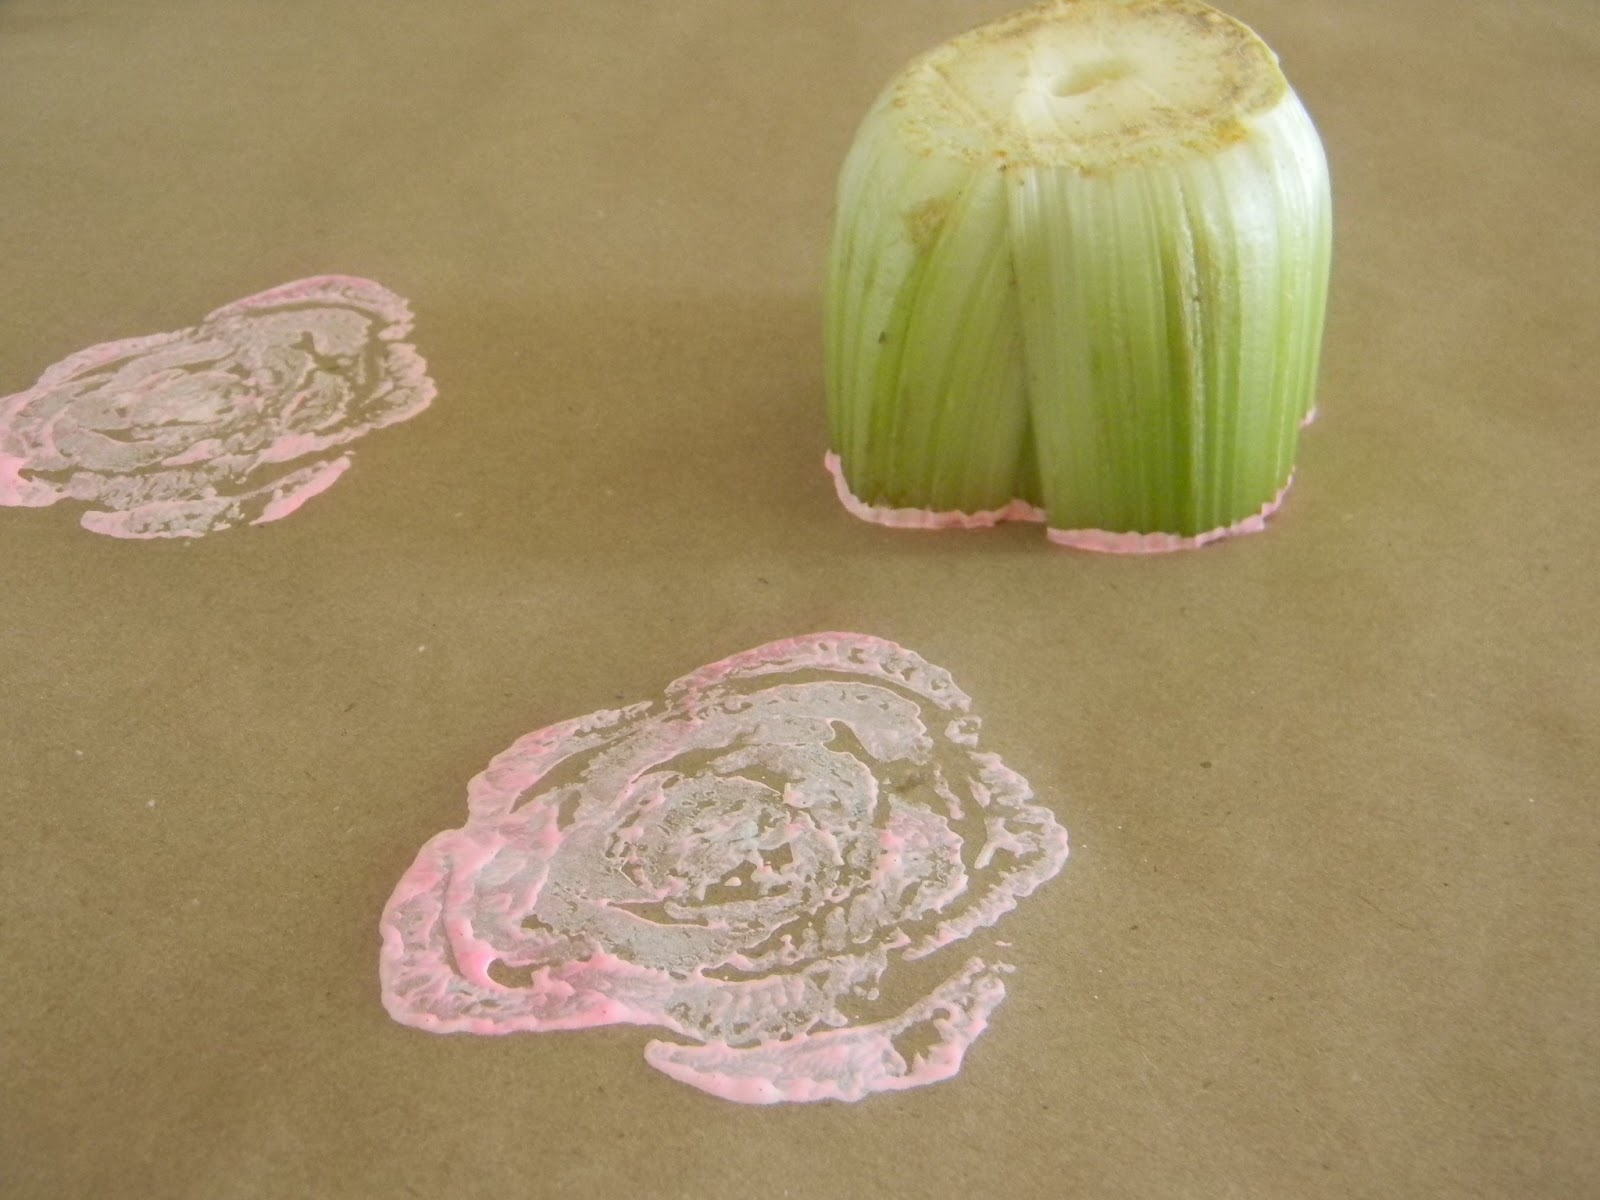
Celery print tutorial


I am back with another tutorial.  Today I will show you how to print pretty flowers with a celery.  Maybe later you can tell me how to do a celery soup or how to incorporate the celery in a delicious salad.  I am sure you guys are better at it that I am. 
Materials:
celery
knife
acrylic paint
brush
*Kraft paper roll 

*I buy mine at 99cents store

Cut the bottom off the celery, as you can see in the picture my original flower celery was kind of funky looking so I took a 'petal' off to make it smaller and neater.

I mixed pink and white to get a lighter shade of pink.  I didn't mix completely to get a variegated look.  You totally don't have to mix colors if you have a single color you want to use go for it!

Here is the fun part, start printing away!  Wait till the paint has completely dried so you can start using your flower paper.

This is the final result.  A wonderful roll of kraft paper for wrapping gifts and such!

I also use mine to wrap my etsy sales.  Have fun printing celery flowers.

Tuesday, March 26, 2013

Tea lights and washi tape tutorial

This is an easy peasy tutorial, a literally easy way to get a lovely fun instant decoration.
 

Materials:
Tea lights
*kawaii tape or deco tape
scissors

*you might have this type of pretty tape at home. In case you don't and are wondering where you can get it?  
You can get it here in my shop
I am guilty of advertising once in a while  here I know!

Easy does it, just wrap the tape around the tea light candles.

Enjoy!

NOTE:  As a reminder never leave burning candles unattended. Keep burning candles out of reach of children and pets. Avoid exposing burning candles to drafts and use caution when extinguishing.

Tuesday, March 12, 2013

Fabric Bandaids and fused plastic carrying case tutorial

Remember this little one?   She will be one years old on  April 4th.  The little munchkin started walking at  10 months!!  Time to get mommy ready for the challenges of toddler hood. 
 
For today's tutorial I will show you how to make pretty band aids covered with fabric and a fused plastic carrying case.

Material needed:
band-aids
fabric scraps
glue dots or double sided tape
scissors

Step 1:  Cut out a piece of fabric a bit bigger than the band-aid

Step 2:  Place three dots of glue on the band-aid.   Center the middle one in the middle of the band-aid and the other two try to place them as close to the edge as possible (in this picture I didn't so my bad) or use double sided tape.

Step 3:  Place the fabric on top of the glue dots (or double sided tape) and cut around the edge.

You have a pretty band-aid now!

Or more! 

Now for the carrying case
Materials:
iron
scissors
plastic bag (the thin kind you get at the supermarket works best)
*parchment paper, wax paper, or regular paper
piece of velcro (I forgot to take a picture)

*I am using brown bags, it really does not matter what kind of paper you use but it is very important that the paper  is larger than the size of the plastic you want to fuse.

Step 1:  Prepare the plastic bag by flattening it, trim out the handles and bottom of the bag

Step 2:  If the bag has printing turn it inside out and fold it so that you have an 8 ply piece.

Step 3:    Sandwich the 8 ply plastic bag between two sheets of paper.  Do this in a well ventilated area.  Start with a medium setting, move the iron around, don't keep it in one place, make sure you get the edges.    Every 10 to 15 seconds turn the 'sandwich' over and keep ironing.  Make sure you do not iron the bag, you do not want to mess it up.  I am not responsible for your irons ladies!!   You can also check in between the layers to see how it's coming and you can decide to turn up the heat if you like.   But be careful because the plastic gets very HOT! Basically you do not want any bubbles and if you see any iron some more.

You will end up with a sort of plastic fabric very sturdy and durable also easy to clean.  I've been carrying in my purse a little coupon holder  made out of this material for the longest time.

I am not going to lie to you.  Chances are will mess up the first time you try this ( If you don't Starbucks is on me!  Let me know please).  I messed up the first time I tried it!  I am not undermining your ironing capabilities, but this is a thing you have to get a feel for.

Cut it in a trifold wallet size to fit the band aids.  Sew around the edges and place the velcro as closures.

NOTE:  you may say "Wait a minute this bag is not the same as the one on the first pictures." No, it is not!! I messed up on the first bag; not on the ironing part but I cut it the wrong size to fit the band-aids :/

This will make a great little handmade gift or you may keep it in your purse for yourself.  Because really a boo boo will feel better in a pretty band-aid.  Please seek medical attention if it's more serious than a boo boo. Please.

Tuesday, March 5, 2013

Brick bookend tutorial


                  A housewife on a budget is well... 
                 simply that a housewife on a budget.
I wish I could go out and buy whatever I want but I can't.

In order to start fixing my desk and since the little drawer space was too small to fit most of the books I had to put the books at the very top.  I had no bookends.  So what did I do?  Do it myself bookends.

Materials needed:
two bricks
sheet of scrapbook paper ( my sheet was (12x12 in)
scissors if needed
glue gun

This is really a no brainer.  Just wrap like if you were wrapping a gift, instead of tape use the glue gun.  I am sure you can tell my paper was a tad bit too short in the back.  But I won't tell if you won't tell.  That will be our little secret.  You can also use fabric to wrap the bricks.

There you have it two wrapped bricks that function as bookends.

Some of these books are mine and some are my husband's.  I thought it was very funny to see the titles 'Life couching for dummies' and 'Aromatherapy for dummies'  I guess there are a lot of dummies in this house.

Tuesday, February 12, 2013

Paper bookmark tutorial


By popular demand I am back with another simple tutorial, ok ok so only a couple of you guys asked for more tutorials (thank you ladies)

This time I am making paper book marks only because Sophia keeps misplacing hers and because really she grabs a random piece of paper and writes on it "this is Sophia's bookmark" or she uses a comb, or her ipod, the remote control, the floss container, a straw... I could go on and on.  I decided to make a few bookmarks for her and for Valentine's sake I made a few more for my nieces and nephews.


Materials needed:
paper cutter or scissors
glue
scrapbook paper  with pretty designs
cardstock
whole puncher
different kinds of ribbon

Step 1:   cut out paper rectangles.  Mine are 6 x 2 inches. You can make them any size you want. You will need two pieces of paper per bookmark, one card stock and one scrapbook paper.

Step 2:  Pick two pieces one card stock and one scrapbook paper.Glue the back sides together, only a little bit of glue will do, this is only to keep them together when you sew them in the next step.
 
Step 3:  Sew around the edges.  I didn't even attempt to sew straight  because I knew I wouldn't achieve it.  Besides an uneven stitch looks lovely on paper :0
 
Step 4:  Punch a hole in one end and thread the ribbon. Ta da!

These are so customizable, and surprisingly hold up real well.  Now the next thing is to figure out how make it so that Sophia does not misplace them.

Tuesday, February 5, 2013

Cake Flags tutorial

A couple of weeks ago an etsy customer told me that she wanted to learn how to make cake flags with fabric and asked me to do a kit for her.  I instantly thought  'gosh but it's so easy!!'   Lots of thoughts came to my mind as I struggled thinking " I can just cut the fabric for her and sell it but that is so easy to do :/ I would feel guilty selling the cut fabric ",  and she also said "she wanted to learn how to do them" so I decided to give tutorials a try. I sent her a couple of pictures with the instructions and also offered to make the kit for her if she wanted me to.  She later thanked me for the tutorial.

I realized a lot of people don't have the craft in them, or are not interested or just don't have the time.   I am one visual person and sometimes get lost reading long directions so pictures are important for me and of course basic instructions come in handy too.  A lot of the time I improvise on the materials or the steps and I think that's where the beauty and uniqueness of handmade comes in.

So here is my first tutorial (by the way they can be made out of paper also)

Material needed:
fabric (you'll feel better is you recycle as I did I used some of Sophia's old pants)
glue
scissors
pins
toothpicks
*triangle template

*my template's base is 1 inch and 1 1/4 inches tall, it does not have to be perfect like I said improvise.

Step 1:  Fold the fabric and pin the template making sure not to cut the folded base of the triangle.  You will end up with a rhombus shape.

Step 2:  Place the toothpick in the middle and put some glue, fold the fabric in half and press with your fingers making sure the toothpick is glued tight between the two layers of fabric.  The fabric will get wet so just let it dry.  The flag will dry a bit stiff but it's a good thing.

Step 3:  Repeat as many flags you need.

If you are using paper instead of fabric use only a little bit of glue.

I am a rookie at this tutorial thing but hope you enjoyed it!

Go ahead and bake some cupcakes for your Valentine :)
 
@moncy3.com 2009-2016